Lessons Learned from Creating a Udemy Course
Posted by Al Sweigart in misc
I've created two online courses through Udemy.com for my books. I initially created them to promote my books, but have actually made significant income from the courses themselves:
- Automate the Boring Stuff with Python (use this link for 80% off)
- Scratch Programming Playground (use this link to sign up for free)
This post contains the lessons I've learned and my process for creating video tutorials, and I hope others who want to do the same find it useful. While this post is specific to Udemy and programming courses, the same lessons probably apply to all online courses.
The TL;DR
- If you want to sell your course, you're limited to Udemy.
- If you want to make a free course, post it to Udemy as well as YouTube.
- Don't expect to make enough money to justify it as your job.
- Don't expect to make any significant amount of money at all.
- Almost all of your paying students bought your course through a huge discount, not the original price.
- Your primary way of pushing your course is offering large discount codes that reduce the price to $10 or $15.
- It'll take on the order of months to create a course.
- Do several takes for each video, but record each of them as though they were the final take.
- I prefer practicing the lines doing multiple takes over writing and reading off of a script.
- I use Camtasia Studio ($200) to record my screen and edit the video.
- I use Audacity (free) and the Noise Gate plugin (free) for post-production of the audio.
- I use a Yeti USB microphone ($130) and Logitech c920 webcam ($65) because they're the best tradeoff between quality and cost.
- You don't need to use a webcam to add a "talking head" to your videos.
- You don't need to spend much money on your bedroom recording studio. Thick blankets hanging from ceiling hooks work well enough for sound-proofing.
- Lower your screen resolution to 1280 x 720 so that video is quicker to stream and the text isn't too small to read.
- Do a quick test video before each recording session. Make sure your mute button isn't on!
- For the first couple of weeks, make your course free with discount codes. This builds the initial audience and reviews, which gives your course credibility.
- Don't worry about people pirating your course to watch it for free.
- Worry about people pirating your course and selling it themselves.
Which Site to Choose for Your Course
You're pretty much limited to Udemy.com if you want to charge for your course. EdX, Coursera, and most online course sites unless you're a professor affiliated with a university. Even if you're creating a free course to host on YouTube or Vimeo, Udemy can be an additional place to put your videos. The Udemy content requirements are good guidelines for YouTube and Vimeo videos anyway.
You could host the videos yourself, though you'd have to create the website, handle payments, and do all your own promotion. I recommend against this, especially for your first course, unless you know what you're doing.
How Much Money You'll Make and How
The Automate course, as of April 2017, has over 46,000 students signed up. Many of these students signed up for free with discount codes I provided. Most paying students will buy the course after being referred by a Udemy promotion with a substantial discount code. Through this promotion, no matter if you set your course for $50 or $500, these students probably paid $10 or $15 for the course. This is normal. Udemy will pay you about $1 or $2 for the students it signs up for your course. I didn't realize Udemy was selling my course at a discount at first. But I don't complain because most of my course's income comes from Udemy discount promotions. Don't worry about the steep discount and (generally) trust that Udemy knows how to sell your course.
Udemy, like a department store, is always running sales. I've paid for courses on the site myself, and can tell you that you should never pay full price for a course. Almost no one ends up buying your course at the original full price.
You can (and most definitely should) create discount codes. Udemy pays you almost the full price (less a dollar or two) for students who sign up using your discount code. If a student signs up for your $100 course using a 90% discount code you provided, Udemy will pay you about $8 or $9 of that $10. Again, this is normal. But it's also a great incentive to advertise your own course. I always push the discount code that lowers the price of my $50 course to $10, hence the FOR_LIKE_TEN_BUCKS discount code.
Again, even though I could make a lot more money per student by referring them myself, most of my Udemy income comes from students that Udemy found just because they find so many for me.
I'm really pleased that my Automate course has done so well: most courses get very few students to the point where it's really not worth the time to create the course. It'll get you beer money, but not much else. My course gets me a 4-figure sum per month (before taxes). Not nearly as much as I could make as a software developer, but enough to keep me from living entirely off savings.
I put a lot of hard work into my Automate course, but also I got lucky with it. On the other hand, my Scratch Programming Playground course only got me about $170 last month. And there's no telling what the popularity of my courses will be next year, or two years from now, or five years from now.
The Course's Videos
The Automate course took about four months to create its 50 videos totaling 9.5 hours. (Factor in that I originally wrote the course's content for the Automate book.) But it has definitely paid off considering that I now have it as a passive income stream and only need to answer maybe a half dozen student questions each week. This was my full-time job, but I had other projects too. If I focused only on creating the course, it could probably have been done in two or three months.
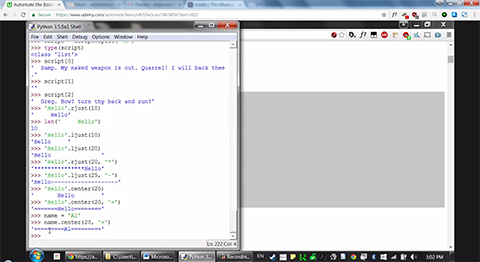
My videos are screencasts, where I use software to record the screen while I do a voice-over explanation. This format works well for programming courses: The students can see the code that I type into an interactive shell and hear me explain how it works.
You don't necessarily need a script, but:
- Write down a detailed outline that you can consult while recording.
- Expect to do three or four takes for each video. I'm almost never satisfied with the first take.
- If you do practice takes, record them anyway as if you were doing a real take. There's something about having it recorded that makes me treat the take more seriously.
- When you do a practice take, do the entire video from start to finish just as you would do for a real take.
- Rather than immediately edit the video after recording it, I record several videos at a time, then edit several videos at time. It takes me a while to get comfortable recording, and I like to keep the ball rolling once I'm warmed up.
The most important thing about your videos is that they are concise and get to the point. The optimal video length is apparently 6 minutes. Udemy caps individual videos at 20 minutes. Most of my Automate course videos were between 9 and 13 minutes.
For my Python course, I also sometimes made use of pythontutor.com's visualization tool. Upload a program (it can't have third-party modules, text input, or file access) and it will create a debugger-like trace for each step of your program. To visualize the evaluation of individual expressions, I use my own ShowEval tool.
Recording Software
I'm on Windows 7 and I use Camtasia Studio (available for Windows and Mac) to record the screen and edit the videos. It can also record from a webcam and place it in your videos. Camtasia costs $200 ($170 for students and educators), though if leave your order in your shopping cart for a few days, they'll email you a discount to encourage you to complete the purchase. (This trick works on other websites, though not Amazon.)
CamStudio for Windows is free but fairly bare bones. It only records the screen so you'll need separate video editing software.
You'll also want to download the free Audacity software and the Noise Gate plugin. While Camtasia's noise reduction is okay, the noise gate plugin will detect periods where there is minimal sound (i.e. when you pause your speaking) and replace it with dead silence. This is a large improvement over just the noise reduction algorithm.
Recording Hardware
I have the following in my amateur bedroom recording studio:
- Yeti USB microphone
- Pop filter
- Mic stand that attaches to the desk
- Logitech c920 webcam
- 100w equivalent cool light bulbs in cheap clamp lamps
- A cheap green screen
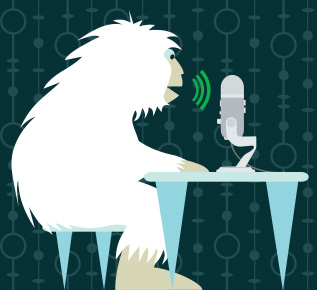
I record with a Blue Yeti USB Microphone and a pop filter over it. For convenience, I bought a microphone stand that attaches to my desk. It frees me from having to awkwardly stack books to lift the microphone closer to my mouth. Don't record from your laptop's built-in microphone; it picks up the vibrations from your CPU fan and the audio quality is simply unacceptable for an online course.
If you want to do a talking-head recording with a webcam, your laptop's built-in webcam is not high-quality enough (and the low camera angle isn't flattering). The standard USB webcam that streamers use is the Logitech c920 which runs about $65. Cheaper webcams tend to be no better than your built-in webcam, more expensive webcams are more quality than you need. Although the newer Logitech c922x is nicer for $95 (they're compared in this PC World article).
You'll also need lighting and a green screen. You can spend a lot of time researching these topics, but I've found that getting 100 watt equivalent, "cool" bulbs (with blue/white-ish light) such as this 4-pack from Phillips works for me. You don't want to use "warm" yellow/orange-ish light bulbs.
A standing lamp or cheap clamp lamps with reflectors are all you need. There's no such thing as a high-quality clamp lamp: the cheap ones will do fine. Also, don't bother buying a photography light reflector: you can make one out of cardboard, aluminum foil, and tape that works just as well. Photo reflectors are nice if you don't want to shine the lamps directly on yourself but instead shine the lamp on the reflector and catch the reflected light.
Remember to shave and wash your face before recording it.
For a green screen, I bought a cheap one off Amazon that is little more than a green bed sheet. The creases need to be ironed out, but your video editor's green screen feature will work well enough even if it isn't perfect. You'll need a few more lights to prevent shadows from falling on the green screen.
Unless you're setting up a dedicated room to act as a studio, you don't necessarily need to buy foam sound-proofing tiles. My solution was to get some used duvets from the thrift store, poke some zip ties through one edge and form a loop, and then hang them from ceiling hooks. I have two duvets to form a sort of cylindrical blanket fort around my bedroom desk that I can take down when I'm done recording.
![]()
I didn't really notice the echo when before I had this setup, but I do notice a slight improvement when I compare recordings with and without them. I'd recommend at least some kind of sound proofing for everyone.
Connect your laptop to a monitor. This second screen won't be recorded for the screencast, but can hold notes or web pages you want to look at while recording.
Scripts, Speaking, and Recording
I favor doing multiple repeat takes to practice my delivery, as opposed to writing a script. Scripts take time to write, and while you might be able to do the recording in one take you could end up sounding robotic by reading off a script. Multiple takes can be tiresome, but the final take usually sounds more natural. I almost never pull footage from different takes for the single final video.
You'll come up with ideas and rewordings while doing a take, so a script would need rewrites anyway. Think of each video as a short speech you'll give: you don't need to memorize every word, but you should have all the topics you want to hit memorized.
Position the mic close to your mouth. The Yeti mic is a side address microphone, so have it facing you rather than pointed at you.
Read the rest of Blue's Yeti microphone FAQ. Do a quick test recording to make sure it sounds okay and is not muted. (More than once I've finished an entire take, then realized my laptop's mute setting was on the whole time.) Also, between your laptop's built-in microphone, the webcam's microphone, and the Yeti microphone, make sure that you have the Yeti microphone selected as the audio source before you record.
It's better to speak slowly than quickly. Udemy, YouTube, and other video sites often have video speed-up options. A normal conversation speed is best for videos. Keep in mind that many of your students won't speak English as their first language.
Do a few tongue twisters before recording to get into a presenter mindset. You don't want to be low-energy sounding. I find it helps to smile while speaking. If you aren't recording your face, open your mouth wider than usual to keep yourself from muttering. Keep a glass of water nearby, but not on the desk. Make sure it won't spill on anything if you accidentally knock it over.
I lower my screen resolution to 1280 x 720 (720p) to record. Compared to my laptop's normal 1920 x 1080 resolution, this makes the video files smaller, quicker to download, and fit on more screens (including phones). People watching on 1920 x 1080 screens can have your video open but also fit other windows on their screen simultaneously. But most important for programming screencasts, it makes text larger and easier to read. Sometimes I'll increase the text editor's font size as well.
Don't make videos composed of just a PowerPoint presentation. A screencast is much more information-rich. It's one thing to say "compile the program", and another to actually see someone navigate menus and click buttons to start the compilation process.
If I get flustered while recording, I just take a quick 10 or 20 seconds to compose myself. It's easy to find these silent pauses in the video editor and cut them.
Here's the pre-recording checklist I run through:
- Close instant messaging programs that could have pop-ups while recording.
- Make sure the Yeti microphone is selected as the audio source.
- Have a glass of water nearby.
- If I'm recording my face: shave and wash my face.
- Do some tongue twister warm ups.
- Make sure the mic is unmuted.
- Position the mic close to your mouth.
- Set screen resolution to 1280 x 720.
- Do a quick test recording to make sure the audio sounds okay.
- Smile!
Promotion
The worst approach to take is protectively caging up your course. A paywall is biggest wall to getting paid. If you want to make money, you need to start by giving your course out for free to build up a respectable number of students and reviews. I'm always hesitant to buy courses that only have a couple hundred students and a dozen reviews. You won't get paying students until a lot of students have vetted your course.
Announce your course on social media and Reddit with a free code to generate initial interest. Don't offer just a discount for this promotion: make it entirely free. A 90%-off discount still looks like spam. Be sure to note that this free code is for a limited time and make it sound personal like, "I've finished my new Python course and made it free this week with code THANKS_REDDIT". You'll probably get people messaging you after the period asking if they could also get a coupon. Be generous and generate a coupon for them, along with something like "If you like the course, please do rate it." Don't make it sound like you're demanding a positive review in exchange for the code.
Be generous with how many videos you make available for free previews. Of the 50 videos in my Automate course, I have the first 15 free to view (along with some other random videos later in the course). Also make these videos available on a YouTube channel, with links back to the Udemy course page. Better yet, have links using a discount code you made for YouTube viewers (this will also let you track how many students YouTube is bringing you.)
Udemy also allows you to make as many or as few of your videos available for students to download. I go ahead and make all of my videos available for download. It's a large convenience for students. And anyway it's fairly easy to google for instructions on how to download them regardless.
Don't worry about people pirating your course and watching it for free. The only way your course won't be put on torrent sites is if no one likes it to begin with. The kind of piracy you do need to worry about are other people taking your videos and selling them on Udemy or other sites. These sites will have a DMCA or infringement notice form that you can fill out. It's good practice to do searches for your course every now and then.
The promo video that people will see on your course page when they're deciding to buy it or not is incredibly important. Spend as much time as you can and follow Udemy's promo video guidelines religiously. You may want to consider spending money on background music or intro/extro video clips. I like using Pond5.com for buying sound clips.
You might not want to use Udemy's free service to generate a logo. The quality is okay but they tend to reuse them for other courses with just a color palette change. You may want to consider commissioning a logo from a graphic designer. Think of it like a getting a tattoo: keep it simple and spend more than $5 on it.
Good luck!
These are the tips I figured out about my process over a long time, and I wanted to compile them all into a blog post to give others a head start. If you want to learn more, here are some topics to google: