Fabric.js Tutorial Part 4
Posted by Al Sweigart in misc
Part 4 of a tutorial series on the Fabric.js canvas/graphics library for JavaScript, where we learn about drawing with paths.round color of a canvas as well as the shapes fabric.Polygon and fabric.Line.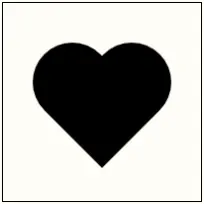
You can see the previous Part 3 or start at the beginning with Part 1.
In this part, we'll draw shapes using SVG's language for paths. Paths are custom shapes that are ideal for creating complex vector shapes that the usual Rect, Circle, Polyline, and other shape classes cannot easily construct. Fabric.js reuses SVG's path syntax, which is helpful considering how much overlap there is between the two graphics systems.
Drawing a Hamburger Icon
We'll begin this tutorial by using paths to draw the "hamburger icon" used by many mobile apps:
Unlike a fabric.Polyline shape, paths don't have to be connected lines. And as we'll see in future tutorial parts, paths can also include curves in addition to lines.
The full code for this hamburger icon is at at https://inventwithpython.com/fabric-js-tutorial/fabric-js-path-hamburger.html or on JSFiddle. Let's examine each part individually:
<!DOCTYPE html>
<html lang="en">
<head>
  <title>Fabric.js Path - Hamburger Icon</title>
  <meta charset="utf-8" />
  <meta name="viewport" content="width=device-width, initial-scale=1.0">
  <script src="https://cdnjs.cloudflare.com/ajax/libs/fabric.js/5.3.1/fabric.min.js"></script>
</head>

<body>
  <!-- The HTML <canvas> element: -->
  <canvas id="hamburgerCanvasId" width="200" height="200" style="border: 1px solid black;"></canvas>
</body>


<script>
let hamburgerCanvasObj = new fabric.Canvas('hamburgerCanvasId');
This is the HTML boilerplate that we've used in previous tutorial parts. The <canvas> element that we create has an id of 'hamburgerCanvasId'.
let hamburgerIconPath = new fabric.Path(`
  M -40 -40
  L  40 -40
  M -40   0
  L  40   0
  M -40  40
  L  40  40`, {
    stroke: '#333333', strokeWidth: 25, strokeLineCap: 'round', left: 40, top: 40
  });
The mini-language passed to fabric.Path as a string value defines a shape. The two most common "commands" in this language are the move-to and line-to commands. For example, the hamburgerIconPath we create starts by moving an imaginary cursor to the X and Y coordinates of -40, -40 with M -40 -40.
Whitespace is flexible for path commands, so we'll use the ` backtick character to make a multi-line JavaScript string. We only need a single space to separate the parts of a command (such as the M and -40) but we can put in additional spaces, indentation, and newlines for readability.
From the X, Y coordinates of -40, -40, we then have the path draw a visible line to the X, Y coordinates of 40, -40 with L 40 -40. This draws the top line of the hamburger icon. The next four commands moves the imaginary cursor to the start of the middle line (M -40 0) and draws it (L 40 0), then moves the imaginary cursor to the start of the bottom line (M -40 40) and draws it (L 40 40).
You can also use commas to separate the parts of commands: M -40,-40 instead of M -40 -40
The second argument is a JavaScript object that describes the style of the path's stroke color, width, and line cap style along with position the shape on the canvas. We've seen this before with the other Fabric.js shapes in previous tutorial parts.
hamburgerCanvasObj.add(hamburgerIconPath);
</script>
</html>
As in previous tutorial parts, the shape objects we created won't appear on the canvas until we call the add() method for them.
Drawing a Heart
For our next example, let's draw a simple heart shape by setting a large stroke width and a round line cap style. We could create this with fabric.Polyline, but let's see how a fabric.Path shape can also make a heart.
The full code for this heart path is at at https://inventwithpython.com/fabric-js-tutorial/fabric-js-path-heart.html or on JSFiddle. Let's examine each part individually:
<!DOCTYPE html>
<html lang="en">
<head>
  <title>Fabric.js Path - Heart</title>
  <meta charset="utf-8" />
  <meta name="viewport" content="width=device-width, initial-scale=1.0">
  <script src="https://cdnjs.cloudflare.com/ajax/libs/fabric.js/5.3.1/fabric.min.js"></script>
</head>

<body>
  <!-- The HTML <canvas> element: -->
  <canvas id="heartCanvasId" width="200" height="200" style="border: 1px solid black;"></canvas>
</body>
This is the usual boilerplate HTML we've used before.
<script>
let canvasObj = new fabric.Canvas('heartCanvasId');
let heartPath = new fabric.Path(`
  M -30 -20
  L   0  10
  L  30 -20`, {
    stroke: 'black', strokeWidth: 80, strokeLineCap: 'round', left: 30, top: 40
  });

heartCanvasObj.add(heartPath);
</script>
</html>
After creating the fabric.Canvas object from the <canvas> element with id heartCanvasId. The three SVG path commands we give move the imaginary cursor the top left end of the heart (M -30 -20), then draw a line to the bottom point of the heart (L 0 10), then draw a second line segment to the top right end of the heart (L 30 -20g)
Drawing an Arrow
Next, let's draw a simple red arrow using paths. We'll break up the construction of the arrow into three examples. The first is just half of an arrow:
The full code for this heart path is at at https://inventwithpython.com/fabric-js-tutorial/fabric-js-path-heart.html or on JSFiddle. Let's examine each part individually:
<!DOCTYPE html>
<html lang="en">
<head>
  <title>Fabric.js Path - Arrow 1</title>
  <meta charset="utf-8" />
  <meta name="viewport" content="width=device-width, initial-scale=1.0">
  <script src="https://cdnjs.cloudflare.com/ajax/libs/fabric.js/5.3.1/fabric.min.js"></script>
</head>

<body>
  <!-- The HTML <canvas> element: -->
  <canvas id="arrow1CanvasId" width="200" height="200" style="border: 1px solid black;"></canvas>
</body>
This is the usual HTML boilerplate we've been using. The <canvas> element has an id of "Arrow1CanvasId".
<script>
let arrow1CanvasObj = new fabric.Canvas('arrow1CanvasId');
let arrow1Path = new fabric.Path(`
  M -70 0
  L 70 0
  L 30 -50`, {
    stroke: '#D1495B', strokeWidth: 25, strokeLineCap: 'round', strokeLineJoin: 'round', fill: 'transparent', left: 10, top: 40
  });

arrow1CanvasObj.add(arrow1Path);
</script>
</html>
The path we draw is two simple line segments. We move the cursor into position with M -70 0 and draw the two line segments with L 70 0 and L 30 -50. The end caps of the line are rounded due to the strokeLineCap setting of 'round', but notice that the middle point of the two segments is also rounded because of the strokeLineJoin setting of 'round'. If we didn't specify the strokeLineJoin setting, it would default to 'miter' (out of possible settings 'miter', 'bevel', and 'round'.)
Here is what the arrow with a 'miter' line join looks like:
By adding M 70 0 L 30 50 to the fabric.Path string, we can complete the arrow:
This tutorial continues on to Part 5. Special thanks to Hunor Márton Borbély for the SVG tutorial that inspired this Fabric.js tutorial.