Fabric.js Tutorial Part 6
Posted by Al Sweigart in misc
Part 5 of a tutorial series on the Fabric.js canvas/graphics library for JavaScript, we'll learn how to change the size of shapes by scaling them with the scale() method. We'll also get some more practice drawing in general. We'll draw this forest: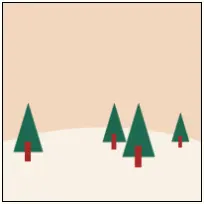
This is Part 6 of the Fabric.js tutorial. You can see the previous Part 5 or start at the beginning with Part 1.
In this tutorial part, we'll learn how to change the size of shapes by scaling them with the scale() method. We'll also get some more practice drawing in general. We'll draw this forest:
The full code for this star is at at https://inventwithpython.com/fabric-js-tutorial/fabric-js-forest.html or on JSFiddle. Let's examine each part individually:
<!DOCTYPE html>
<html lang="en">
<head>
  <title>Fabric.js Drawing a Forest</title>
  <meta charset="utf-8" />
  <meta name="viewport" content="width=device-width, initial-scale=1.0">
  <script src="https://cdnjs.cloudflare.com/ajax/libs/fabric.js/5.3.1/fabric.min.js"></script>
</head>

<body>
  <!-- The HTML <canvas> element: -->
  <canvas id="forestCanvasId" width="200" height="200" style="border: 1px solid black;"></canvas>
</body>
This is the standard boilerplate HTML that we've used in previous tutorial parts. The <canvas> element's id is "forestCanvasId".
<script>
let canvasObj = new fabric.Canvas('forestCanvasId');
canvasObj.backgroundColor = '#F1DBC3';

let ground = new fabric.Circle({radius: 350, left: -250, top: 125, fill: '#F8F4E8'});
canvasObj.add(ground);
We'll start by setting the background color with canvasObj.backgroundColor = '#F1DBC3'; and then use a large circle for the lighter color ground with let ground = new fabric.Circle({radius: 350, left: -250, top: 125, fill: '#F8F4E8'}); We'll need to add this circle immediately to the canvas object so that it is beneath all of the trees we'll create and add later.
let branches = new fabric.Triangle({left: 10, top: 100, width: 30, height: 50, fill: '#38755b'});
let trunk = new fabric.Line([25, 140, 25, 160], {stroke: 'brown', strokeWidth: 6, originX: 'center'});
let treeGroup = new fabric.Group([branches, trunk]);
canvasObj.add(treeGroup);
The tree shape that we'll create is a simple green triangle and a wide brown line shape. To make it easier to clone, these shapes are in a single group and added the group to the canvas.
treeGroup.clone(function(clonedObj) {
  clonedObj.scale(0.8);
  clonedObj.left = 100;
  canvasObj.add(clonedObj);
});
Here we call clone() to make a copy of the tree group, changing the size to 80% of and the left edge position of the clone before adding it to the canvas.
treeGroup.clone(function(clonedObj) {
  clonedObj.scale(1.1);
  clonedObj.left = 120;
  clonedObj.top = 100;
  canvasObj.add(clonedObj);
});

treeGroup.clone(function(clonedObj) {
  clonedObj.scale(0.6);
  clonedObj.left = 170;
  clonedObj.top = 110;
  canvasObj.add(clonedObj);
});
</script>
</html>
Here we finish by making two more trees with the clone() method and changing their position and size.
This is the end of the Fabric.js tutorial for now. If you'd like to see more parts to this tutorial, send Al Sweigart a message at Mastodon or email at [email protected] saying you found the first few parts helpful. Special thanks to Hunor Márton Borbély for the SVG tutorial that inspired this Fabric.js tutorial.