Use this link to get 70% off the Automate the Boring Stuff online video course.
Support me on Patreon


In this chapter, you’ll design a Hangman game. This game is more complicated than our previous games but also more fun. Because the game is advanced, we’ll first carefully plan it out by creating a flowchart in this chapter. In Chapter 8, we’ll actually write the code for Hangman.
Hangman is a game for two people in which one player thinks of a word and then draws a blank line on the page for each letter in the word. The second player then tries to guess letters that might be in the word.
If the second player guesses the letter correctly, the first player writes the letter in the proper blank. But if the second player guesses incorrectly, the first player draws a single body part of a hanging man. The second player has to guess all the letters in the word before the hanging man is completely drawn to win the game.
Here is an example of what the player might see when they run the Hangman program you’ll write in Chapter 8. The text the player enters is in bold.
H A N G M A N
+---+
|
|
|
===
Missed letters:
_ _ _
Guess a letter.
a
+---+
|
|
|
===
Missed letters:
_ a _
Guess a letter.
o
+---+
O |
|
|
===
Missed letters: o
_ a _
Guess a letter.
r
+---+
O |
| |
|
===
Missed letters: or
_ a _
Guess a letter.
t
+---+
O |
| |
|
===
Missed letters: or
_ a t
Guess a letter.
a
You have already guessed that letter. Choose again.
Guess a letter.
c
Yes! The secret word is "cat"! You have won!
Do you want to play again? (yes or no)
no
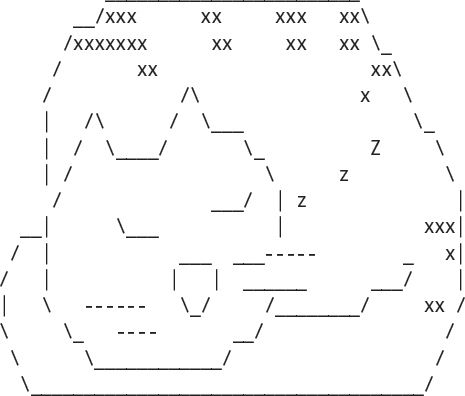
The graphics for Hangman are keyboard characters printed on the screen. This type of graphic is called ASCII art (pronounced ask-ee), which was a sort of precursor to emoji. Here is a cat drawn in ASCII art:
The pictures for the Hangman game will look like this ASCII art:
+---+ +---+ +---+ +---+ +---+ +---+ +---+
| O | O | O | O | O | O |
| | | | /| | /|\ | /|\ | /|\ |
| | | | | / | / \ |
=== === === === === === ===
This game is a bit more complicated than the ones you’ve seen so far, so let’s take a moment to think about how it’s put together. First you’ll create a flowchart (like the one in Figure 5-1 on page 47 for the Dragon Realm game) to help visualize what this program will do.
As discussed in Chapter 5, a flowchart is a diagram that shows a series of steps as boxes connected with arrows. Each box represents a step, and the arrows show the possible next steps. Put your finger on the START box of the flowchart and trace through the program by following the arrows to other boxes until you get to the END box. You can only move from one box to another in the direction of the arrow. You can never go backward unless there’s an arrow going back, like in the “Player already guessed this letter” box.
Figure 7-1 is a complete flowchart for Hangman.
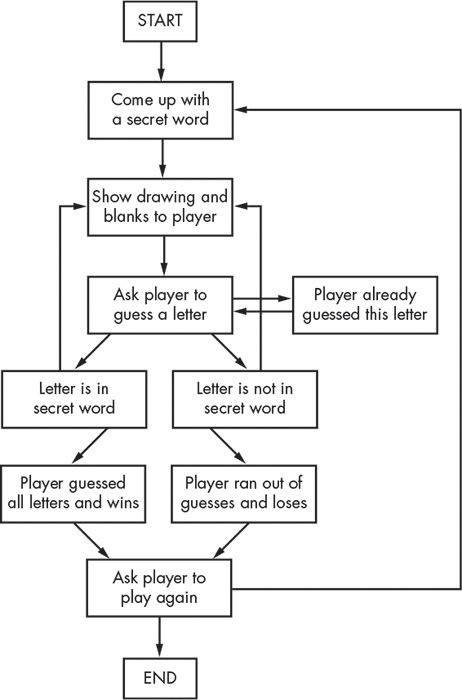
Figure 7-1: The complete flowchart for the Hangman game
Of course, you don’t have to make a flowchart; you could just start writing code. But often once you start programming, you’ll think of things that must be added or changed. You may end up having to delete a lot of your code, which would be a waste of effort. To avoid this, it’s best to plan how the program will work before you start writing it.
Your flowcharts don’t have to look like the one in Figure 7-1. As long as you understand your flowchart, it will be helpful when you start coding. You can begin making a flowchart with just a START and an END box, as shown in Figure 7-2.
Now think about what happens when you play Hangman. First, the computer thinks of a secret word. Then the player guesses letters. Add boxes for these events, as shown in Figure 7-3. The new boxes in each flowchart have a dashed outline.

Figure 7-2: Begin your flowchart with a START and an END box.
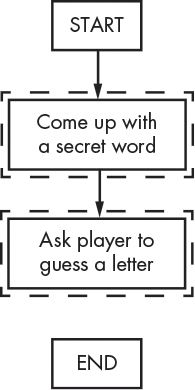
Figure 7-3: Draw the first two steps of Hangman as boxes with descriptions.
But the game doesn’t end after the player guesses a letter. The program needs to check whether that letter is in the secret word.
There are two possibilities: the letter is either in the word or not. You’ll add two new boxes to the flowchart, one for each case. This creates a branch in the flowchart, as shown in Figure 7-4.
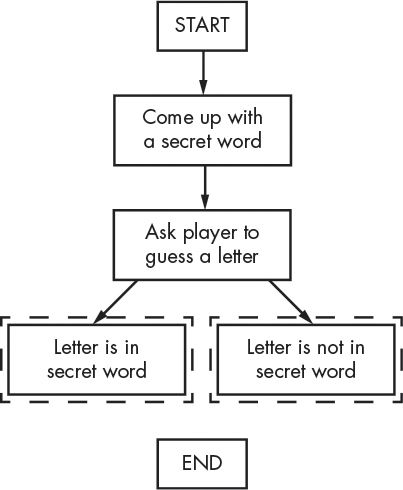
Figure 7-4: The branch has two arrows going to separate boxes.
If the letter is in the secret word, check whether the player has guessed all the letters and won the game. If the letter isn’t in the secret word, check whether the hanging man is complete and the player has lost. Add boxes for those cases too.
The flowchart now looks like Figure 7-5.
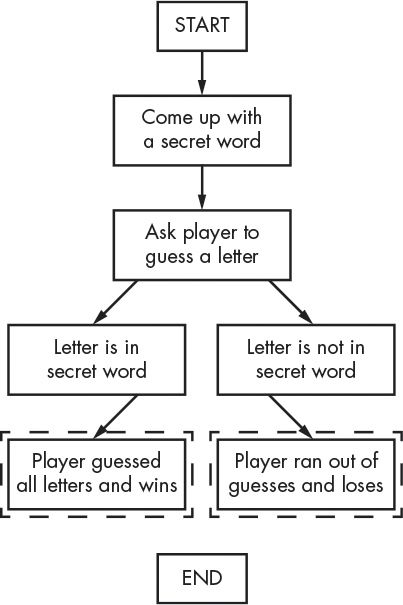
Figure 7-5: After the branch, the steps continue on their separate paths.
You don’t need an arrow from the “Letter is in secret word” box to the “Player ran out of guesses and loses” box, because it’s impossible for the player to lose if they have just guessed correctly. It’s also impossible for the player to win if they have just guessed incorrectly, so you don’t need to draw an arrow for that either.
Once the player has won or lost, ask them if they want to play again with a new secret word. If the player doesn’t want to play again, the program ends; otherwise, the program continues and thinks up a new secret word. This is shown in Figure 7-6.
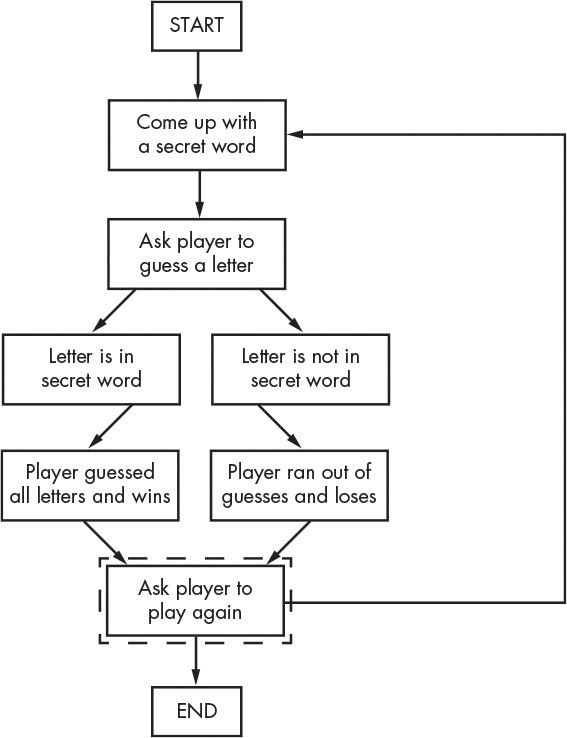
Figure 7-6: The flowchart branches after asking the player to play again.
The flowchart looks mostly complete now, but we’re still missing a few things. For one, the player doesn’t guess a letter just once; they keep guessing letters until they win or lose. Draw two new arrows, as shown in Figure 7-7.
What if the player guesses the same letter again? Rather than counting this letter again, allow them to guess a different letter. This new box is shown in Figure 7-8.
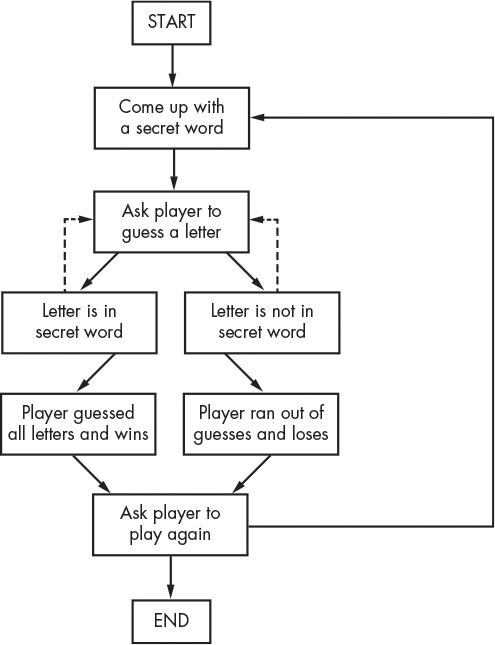
Figure 7-7: The dashed arrows show the player can guess again.
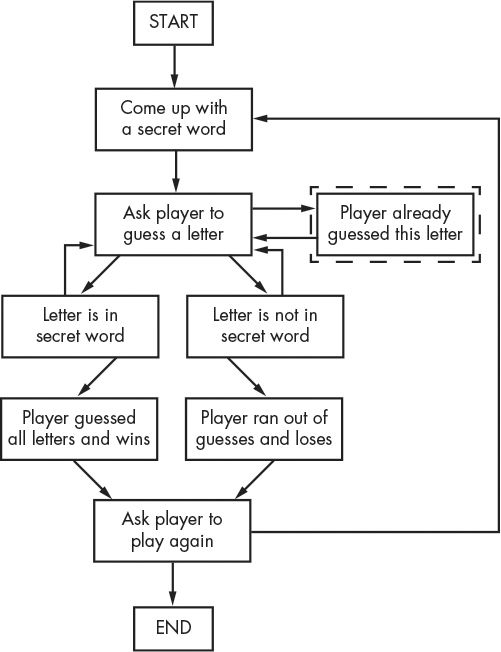
Figure 7-8: Add a step in case the player guesses a letter they already guessed.
If the player guesses the same letter twice, the flowchart leads back to the “Ask player to guess a letter” box.
The player needs to know how they’re doing in the game. The program should show them the hanging man drawing and the secret word (with blanks for the letters they haven’t guessed yet). These visuals will let them see how close they are to winning or losing the game.
This information is updated every time the player guesses a letter. Add a “Show drawing and blanks to player” box to the flowchart between the “Come up with a secret word” box and the “Ask player to guess a letter” box, as shown in Figure 7-9.
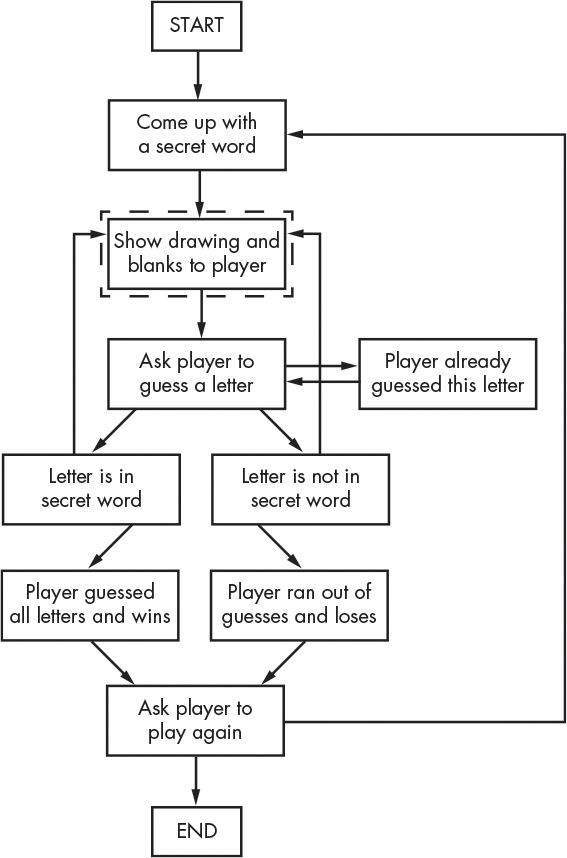
Figure 7-9: Add a “Show drawing and blanks to player” box to give the player feedback.
That looks good! This flowchart completely maps out the order of everything that can happen in the Hangman game. When you design your own games, a flowchart can help you remember everything you need to code.
It may seem like a lot of work to sketch out a flowchart about the program first. After all, people want to play games, not look at flowcharts! But it is much easier to make changes and identify problems by thinking about how the program works before writing the code for it.
If you jump in to write the code first, you may discover problems that require you to change the code you’ve already written, wasting time and effort. And every time you change your code, you risk creating new bugs by changing too little or too much. It is much more efficient to know what you want to build before you build it. Now that we have a flowchart, let’s create the Hangman program in Chapter 8!